Experiment: Autonomous Agents in iSIM
|
| [Overview] [Download Instructions] [How to Use] [How it all works] [iSIM Homepage] |
Overview
iSIM is an interaction simulation environment for wireless iPAQ applications. iSIM allows a user to add people with iPAQ devices and wireless access points to a map. People and access points, also called Agents, can be moved around on the map. All agents also have real world GPS positions determined by a map reference points. iPAQ users on the map also just called Users, send GPS coordinates to their corresponding iPAQ device via a port number on the localhost. In turn, iPAQ applications can send messages to other iPAQs via the simulator. For more information about iSIM please go to the iSIM webpage.
For this experiment, I wished to add intelligent/autonomous agents into iSIM. Currently, iSIM as said before, iSIM provides a simulated environment for moving agents/users that correspond to wearable devices. I have now added the ability to create not just user controlled agents, but also autonomous agents into iSIM. Since the controller of a mobile autonomous robot is basically an autonomous software agent, I felt that iSIM would prove as a great starting ground for testing autonomous robots. Of course, the autonomous robots might prove as an interesting way of simulating people's movement in the real world, but that is for another project.
For this project, I created a simple class for interfacing the autonomous agents with the simulator, so that autonomous agents can be built for any purpose and then plugged into iSIM. The interface simple acts as a conduit for channeling sensory input and actuating output. Thus the autonomous agents need to know virtually nothing about the iSIM simulator. I built two autonomous robots called searcher and rescuer. Both are very simple robots with goals with goals of finding and rescuing people in distress. It is important to note that both these autonomous agents are very simple and rely solely on GPS information and wireless networking. Eventually, I would like to simulate more information such as obstacles and vision. More complex and realistic robots could then be designed to make use of a wealth of simulated data. |
Download
Instructions
The newest code to download is located below. If you need information on the requirements or help on installing iSIM, please see the iSIM directions webpage. |
How to use iSIM with Robots
Once iSIM and iPAQ are compiled, you can now run each program. iSIM can be run normally or by the provide robot script. The robot script makes use of the scenario feature built into iSIM. If you choose to run iSIM with the robot script then a user and two robots will automatically be added to the simulation as in Figure 1. There are two different robots: Searcher and Rescuer. Searcher will not begin to move until it has communicated with a Rescuer. If running the robot script, then this happens immediately. The Searcher and Rescuer exchange some information such as location, and then the Searcher begins to randomly search the map for a person in distress as seen in Figure 2. Once a person is found as in Figure 3, the Searcher will travel directly back to the Rescuer; this location is known from when the Searcher and Rescuer first communicated. When the Searcher reaches the Rescuer as in Figure 4, it will tell the Rescuer where the person in distress is located. Next, the Rescuer will travel to the person in distress as in Figure 5, and aid the person as seen in Figure 6. After that, the Rescuer will return to its original location, and notify the Searcher to go look for more people in distress as in Figure 7.
With the robot script, one person is added to the simulator corresponding to port 6000. In the iPAQ folder there is a GPS distress application that can be run on default port 6000 with the supplied run script. The GPS application will tell you the location of the corresponding user in iSIM as seen in Figure 1. NOTE: You may need to move the user in iSIM if you started iSIM first, so that the GPS application can receive the correct GPS coordinates. Now, in order to make the person call for help there is a single button to click on the bottom of the GPS application. This causes a distress message to be broadcast to any other people/robots in range.
If you want, you can manually add as many Searchers and Rescuers as you want. Just remember that every searcher must be manually placed near a Rescuer in order to get the Searcher properly initialized. In order to create a person in distress manually, you must add a user to iSIM with a corresponding port number to the iPAQ application. |
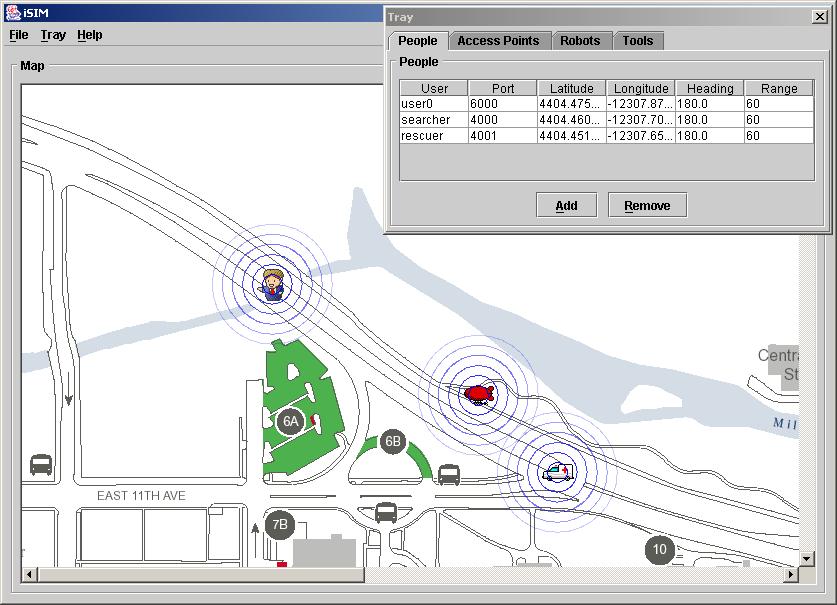
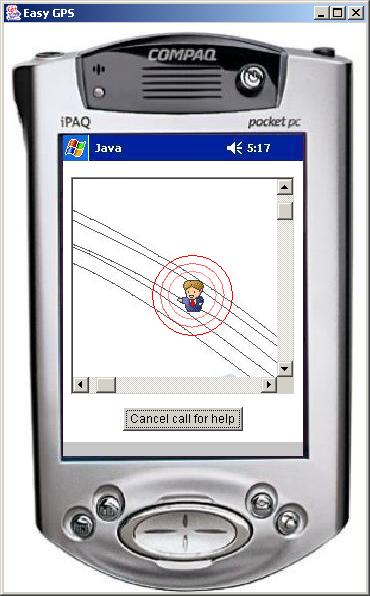 Figure 1. The initial locations of robots and the person in distress. |
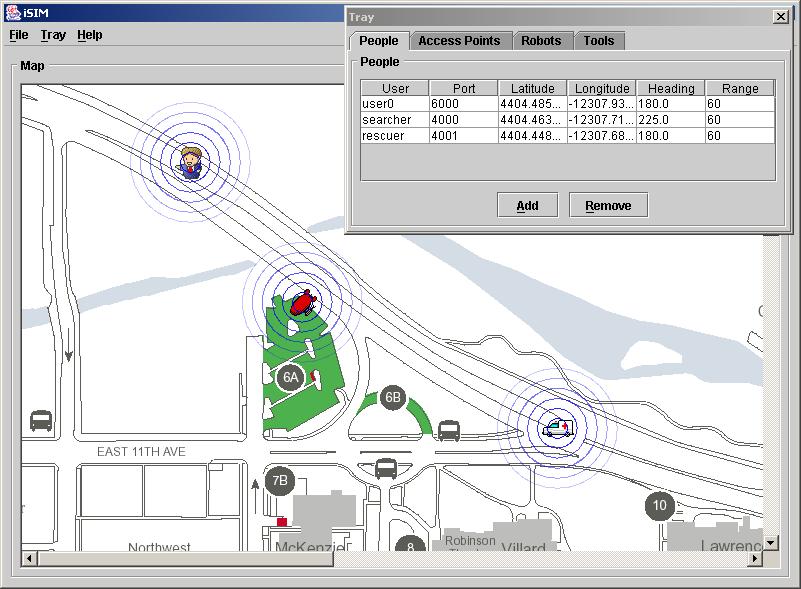 Figure 2. The Searcher currently randomly searches for a person in distress. |
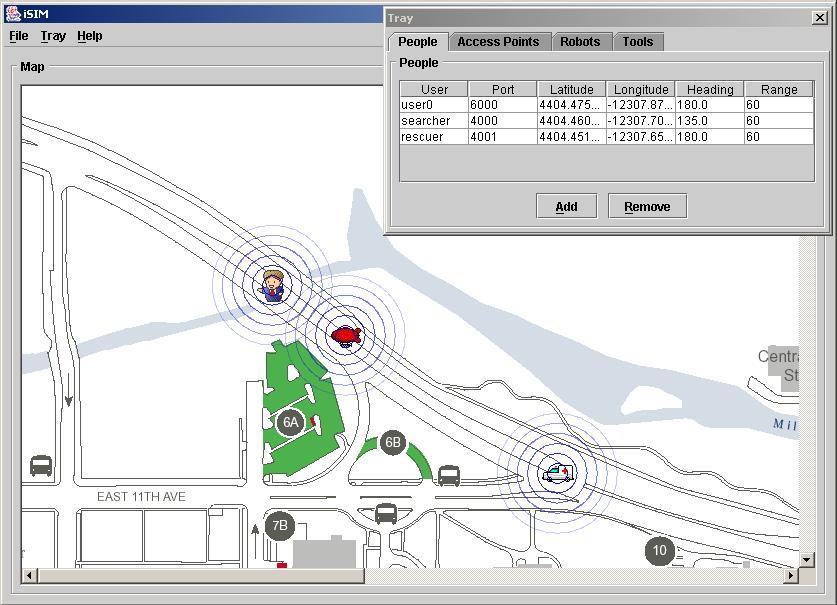 Figure 3. The Searcher once in wireless range, finds the person in distress. |
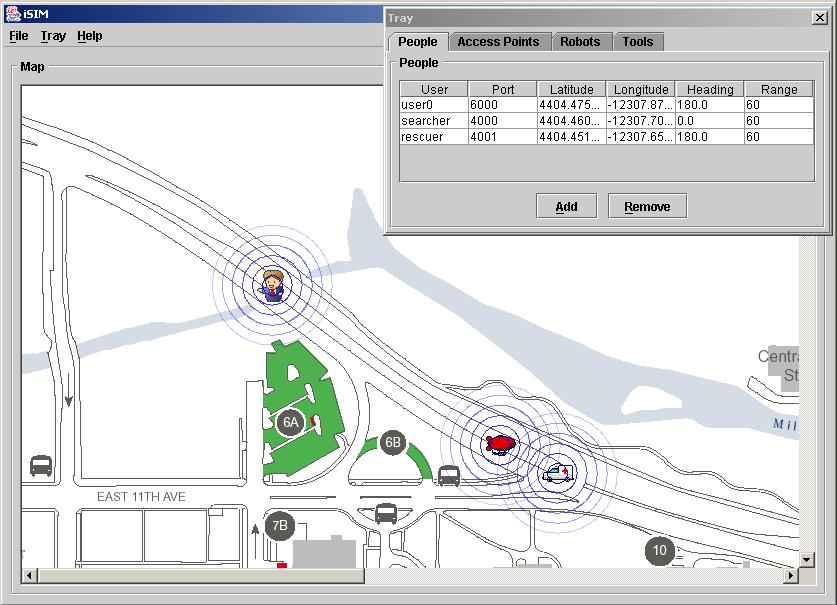 Figure 4. The Searcher returns to the Rescuer and notifies the Rescuer. |
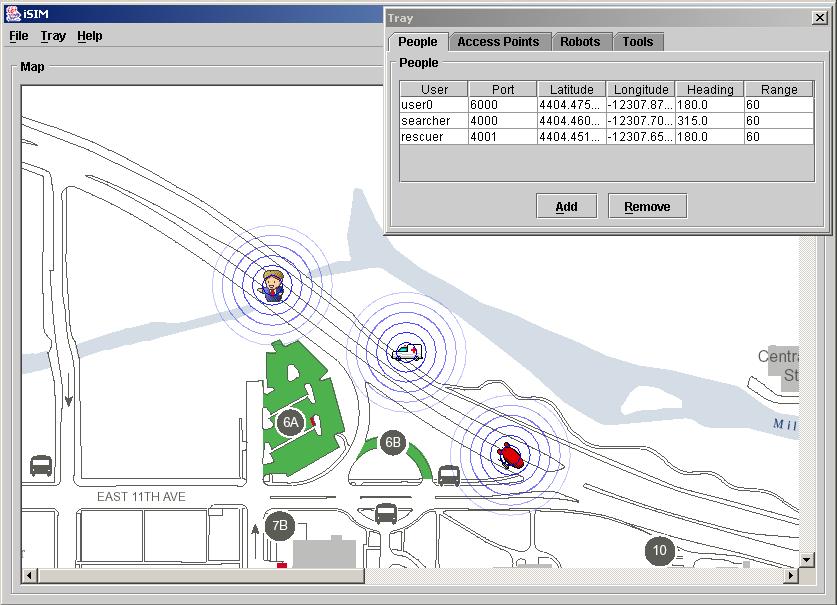 Figure 5. The Rescuer now heads to the person in distress while the Searcher waits. |
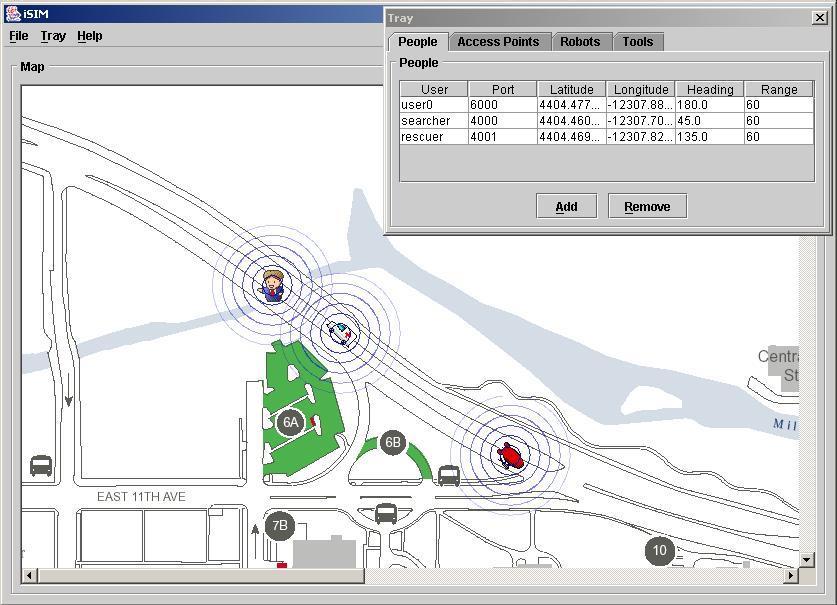 Figure 6. The Rescuer reaches the person in distress and helps the person. |
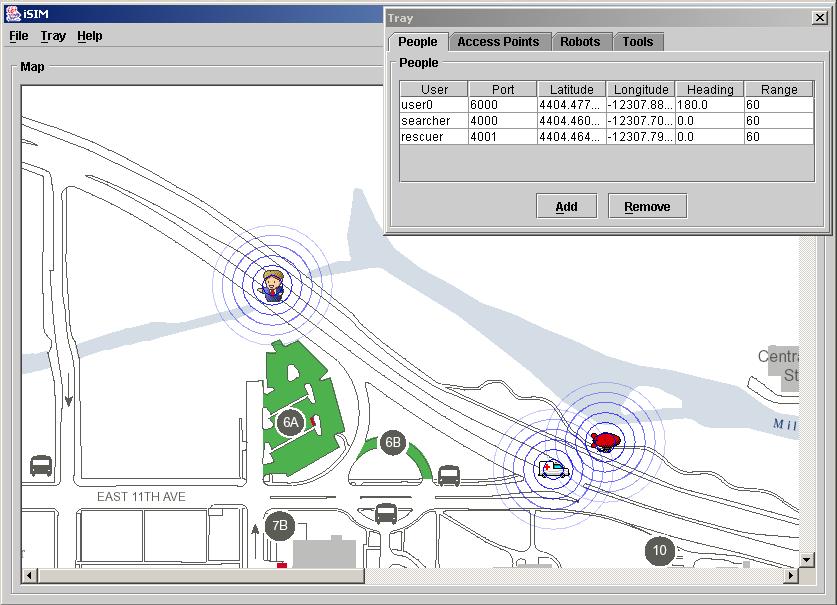 Figure 7. The Rescuer returns to its original location and the Searcher continues to search. |
How
it all works
Although it is not needed to understand how the autonomous agents work, for information on how iSIM is architected please see layout. iSIM contains agents, which can be added to the simulation environment. How it works is that the agents exist in the 2-D map of the simulator. When events happen in the simulator, information is then sent to the agents that are affected by the event. The information is then received by corresponding applications. In this way the simulator can route information such as location, time, temperature, and wireless communication to all agents. Agents were built to represent real people who have a wearable computer of some kind. Thus, an iSIM user can move an agent around in the simulator manually, which simulators the user moving in the real world. And the wearable device application can receive data just like a device in the real world.
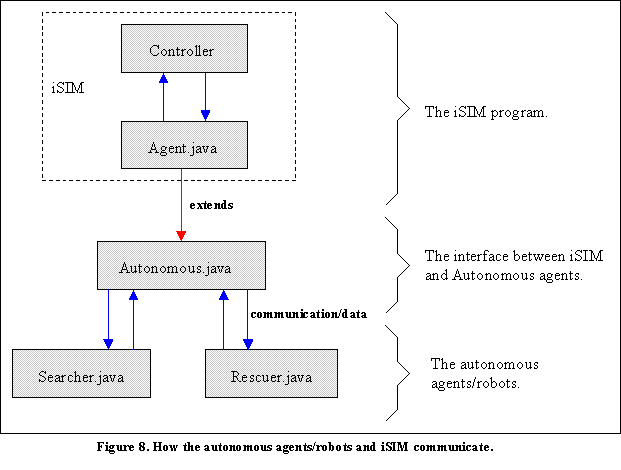
I took this one step further as seen in Figure 8, by eliminating the need of the user. For starters, I extended the Agent class with Autonomy, Autonomous.java, to make an agent that could move on its own. This first step may prove to be very useful in observing the movement of dozens of people in a simulated environment. The agents could be given behaviors so as to model the movement various types of people moving in the real world with wearable devices, but that is another project. After giving agents the ability to move, I proceeded to make the specific Autonomous Agents, Searcher.java and Rescuer.java. Thus, creating agents with the ability and with goals.
By creating the intermediary class Autonomous.java, I was able to the complexity of iSIM hidden from Searcher and Rescuer. Searcher and Rescuer receive all information and direct their actions through Autonomous.java, which for all they know could be connected to real hardware drivers for sensing and actuating real devices. This also gives the maximum flexibility in designing the brains for a mobile autonomous robot. For this project, Searcher and Rescuer are rather simple having very specific goals and only a few possible states. However, with the current design, I have left the ability to create complex autonomous robots that can be tested in iSIM.
|
