I went back to a three blade design to simplify alignment.
I went back to a three blade design to simplify alignment.
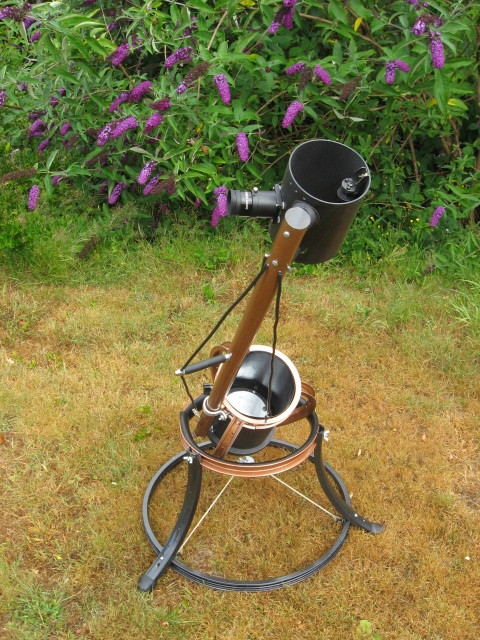
The only thing that was a little challenging was that there isn't a bicycle rim 6 inches I.D. for the top support rim, so I had to make one. And even that wasn't all that difficult. I just cut a 6 inch circle out of plywood, cut and heated a rim with a small propane torch, and bent it around the form. I also tweaked the 3 blades just a tad smaller also. Had I went with the 8 inch mirror, standard bike rims would have worked just fine.
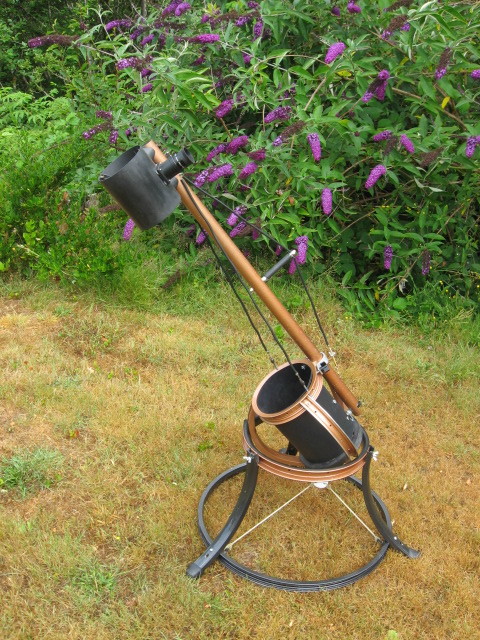
I used the same single stressed strut with three bicycle cable guy lines, through 1/8th inch surgical tubing, to stop vibrations . I am really becoming enamored with the strength of the design, wish I could get other people to try it, hence the "Single Stressed Strut" moniker. My experience with bike cable also is positive. I'm using used cables mostly that we are pulling out of used bikes, so they have been essentially pre-stretched.
To keep the secondary weight down I used 4 inch PVC pipe acting as
a secondary holder and light shield. No focuser, just an eyepiece
holder that allows about a 1/2 inch of focus. I ordered a set of three
par-focal lenses. Works fine.
I boxed myself a little bit in the corner by setting the ball a little high in the bearing support rim. Did that to be able to view a bit lower. It goes down to about 18 degrees from horizontal. That meant that the counter-weight doesn't have much leverage. I attached some lead as a test and the amount I would need made me decide to return to the approach I used on the Cloverball. I attached 3/16 inch surgical tubing to the legs and to a center hub,then a chain/hook attaches to the bottom of the ball. The first tests refreshed my memory of experiences with the Cloverball. The trick is to get the direction of the force downward enough to keep the sideways force from causing the S. ball from rolling up on the rim during it's rotation. I was hesitant to lengthen the legs because of the possibility of introducing vibration, but the bottom ring took care of that. I thought the stand looked better without the ring, but I needed it's strength. Changing the hook's position on chain the changes the tension .
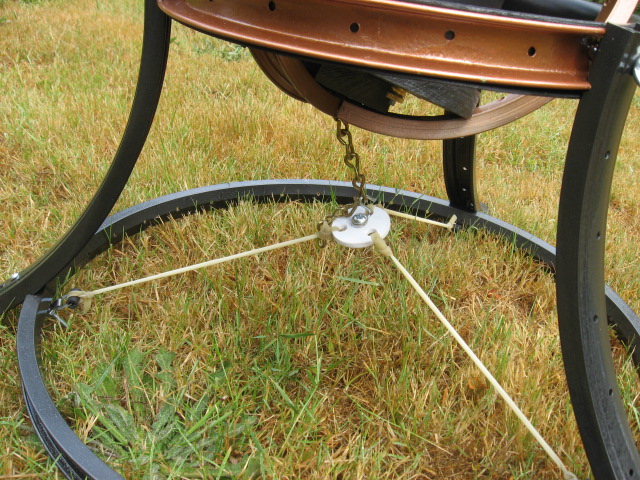
For some reason Surgical tubing seems to have better linear
characteristics for this purpose than springs, plus you don't get that
annoying "spring door" sound. When I was messing with the Cloverball I
found you could tie different lengths of different size surgical tubing
together to control progressive tensioning. Doesn't seem to be necessary
on this one. There is the fact that the tubing will decay over time,
so periodic replacement will probably be in order. If I was doing a 6
or 8, or 10 inch scope I would probably go with springs because of
increased tension, but with the lighter load, the tubing is fine.
One of the beauties of SudiBall scopes is their weight. This scope complete weighs 8 lbs. It would also scale up to a 6, 8, or 10 inch with very little weight gain. I'm also confident that the counter-force system would also scale up. I'd really like to try this design with a 10 inch mirror.
Chuck
2017 July 27